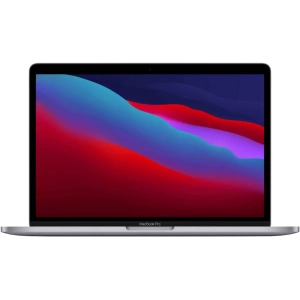
Connecting your Apple MacBook laptop to a projector is a straightforward process that can enhance your presentations and multimedia experiences. Here’s a step-by-step guide to help you connect seamlessly, along with troubleshooting tips for audio and video issues that may arise:
Connecting MacBook to a Projector
- Check Ports: Identify the ports on your MacBook and the projector. Common ports include HDMI, Mini DisplayPort, USB-C, and VGA.
Select the Right Cable: Choose a suitable cable based on the ports available. For newer MacBooks with USB-C ports, you may need a USB-C to HDMI or USB-C to VGA adapter.
Power On Devices: Power on your MacBook and the projector. Ensure the Mac Projector is set to the correct input source (e.g., HDMI, VGA).
Connect the Cable: Plug one end of the cable into your MacBook’s port and the other end into the corresponding port on the projector.
Adjust Display Settings: On your MacBook, go to “System Preferences” > “Displays.” Choose the “Arrangement” tab and configure display settings (e.g., mirror or extend displays).
Projector Settings: Use the projector’s remote or control panel to adjust settings like resolution, aspect ratio, and input source if needed.
Test Connection: Play a video or slideshow on your MacBook to test the projector connection. Ensure audio and video are working correctly.


Troubleshooting Audio Issues
- Check Volume Settings: Make sure the volume on your MacBook is turned up and not muted. Use the volume keys or menu bar controls to adjust volume.
External Audio Output: If using external speakers or the projector’s audio output, ensure they are powered on and connected correctly.
Audio Output Source: Go to “System Preferences” > “Sound” and verify the audio output source is set to the correct device (e.g., internal speakers, HDMI).
Restart Applications: Close and reopen the application playing audio to check if the issue persists.
Update Drivers: Ensure your MacBook’s audio drivers and software are up to date. Check for updates in the “App Store” > “Updates” section.
Check Cable Connections: Inspect the audio cable connections between the MacBook and the projector/speakers for any loose or damaged cables
Video Troubleshooting Tips
- Check Cable Integrity: Ensure the HDMI, Mini DisplayPort, or VGA cable is in good condition without any visible damage.
Restart Devices: Power off and restart both your MacBook and the projector to reset connections and settings.
Adjust Display Preferences: Go to “System Preferences” > “Displays” and verify the resolution, refresh rate, and scaling settings for the projector display.
Try Different Ports/Adapters: If possible, use a different port on your MacBook or try a different adapter to rule out port or adapter issues.
Update Software: Check for macOS updates and install any available updates to ensure compatibility and performance improvements.
Check Projector Settings: Verify the projector’s input source, resolution, and aspect ratio settings to match your MacBook’s display settings.
Test with Different Content: Try playing different types of content (e.g., video, images, presentations) to see if the video issue persists across different media.
Reset PRAM/NVRAM: Resetting the PRAM (Parameter RAM) or NVRAM (Non-Volatile RAM) on your MacBook can sometimes resolve display-related issues. To do this, restart your MacBook and hold down Command + Option + P + R keys until you hear the startup sound again.
Get Expert Help at Aria AV
By following these steps and troubleshooting tips, you can easily connect your Apple MacBook laptop to a projector and resolve any audio or video issues that may arise during your presentations or multimedia playback. Still need help? Talk to projector rental expert at Ariaav.com for help.
